The Corsair saw plenty of use after the Old Ford Show as I finally got to honour my pledges of taking some friends out for a ride in the car. The first was a trip to Amesbury via the beautiful Woodford Valley near Salisbury, a route I used to regularly drive in my younger ‘Capri’ days. We had a drive out to and around Bulford/Durrington and back to their home. The following week I went to Warminster to see another friend for a drive through the town and then a spirited run on the by-pass.
In early August, I went to the Woodford Valley again to meet friends for lunch with all this taking place in fantastic sunny hot weather. The Corsair ran well and driving was a real pleasure. A couple of weeks later it was another good drive out to visit friends at Burley in the New Forest which made for a great day out and the Corsair seemed to be in its element cruising at 40mph on the New Forest roads. The Corsair had been used for many local trips including those to the local recycling centre, where one person was surprised I used the car for such trips, but my reason being that it was easier to use to lift out the loads from the rear seat and I didn’t need much excuse to just drive it, plus it kept the daily driver car a bit cleaner!
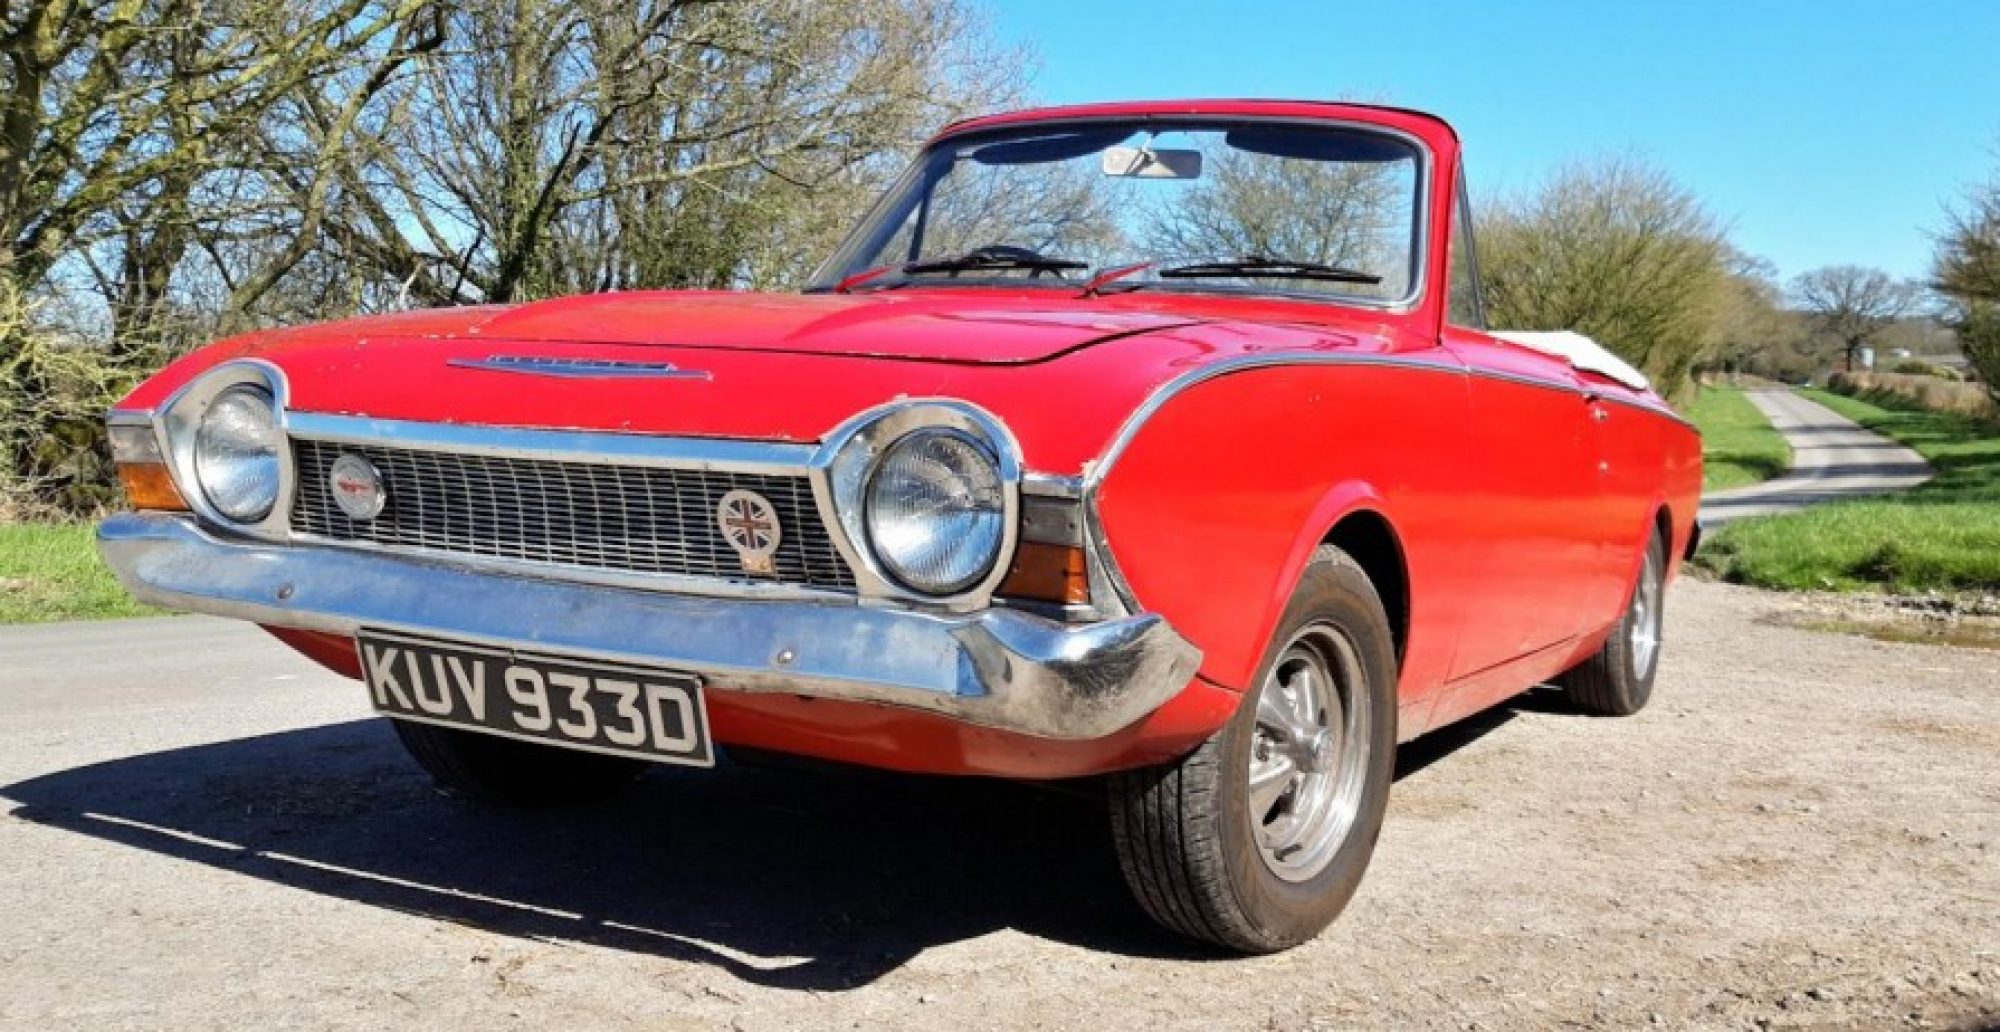
The Corsair at the 2022 Classic Ford Show, British Motor Museum
It had been a long time since I went to a specific car show that wasn’t local. Having driven the Corsair to the British Motor Museum back in April, I felt it was quite within my reach for another trip to attend the Old Ford Day. A member of the Ford Corsair Club had booked a stand on the site and it only required individual entries to gain access to the reserved Corsair area. I booked my ticket for an excellent value for money £9, which included entry for the car, driver and one passenger to the Old Ford Show, Rootes Group Show and the Museum & Jaguar Collection buildings. I took a friend who lived on route as my passenger, so he got an exceptionally great value day out to see the museum collections and reminisce about his past ownership of XR3s and XR2s seen at the show.
After the trip to the British Motor Museum, at Gaydon, the Corsair was running a bit rough, so a bit of a fettle with the points gap and it ran nicely on a mid week local run about on a cool sunny evening. Come the following Sunday, I had planned to see a friend but the car ran lumpy under load and was basically undriveable, so the trip out was cancelled until I could fix the problem. One thing to note, I refuelled the car to the top again after the Gaydon trip (200+ miles) and estimated the fuel economy to be about 30mpg.
The big day came for the Corsair, and the weather was forecast as dry with a cold easterly wind and the threat of the odd shower. Based on the forecast, the previous evening I put the hood up as it would make for a more comfortable (warmer) drive up to Gaydon, near Banbury. On the Saturday with a full tank of fuel (45 litres) I set off at 7 am. The drive was smooth and reasonably swift following the A350 to Warminster on to Chippenham. The journey took longer, as per usual once on the A429, a winding section of road over several miles with very few opportunities to pass slower, perhaps over cautious, drivers. After a toilet break and on the other side of Cirencester, I was back on the A429 (Fosse Way) so the pace picked up with the Corsair cruising happily at 55mph. By 9.30 am I had arrived at my destination of the British Motor Museum, at Gaydon near Banbury to meet with the Enthusiasts of British Built Motor Vehicles Built Before 1985, a Facebook Club group.
Way back in December 2021 I bought a couple of exhaust manifolds on eBay with the intention of fitting them over the Christmas holiday. Three months later I finally get around to finding the energy to do something about them. With the car turned around in the garage and supported on axel stands I begun to undo the exhaust clamps and manifold bolts. I knew I had a bent manifold bolt to deal with and used my Christmas money to purchase a Dremel drill. Thankfully I chose a Dremel 4000 (175W) kit to cut off the bolt that a socket or spanner could no longer get a purchase on. It was just as well I had gone for the kit with the flexi extension, as the Dremel would not have got in to the tight space under the manifold to cut the bolt head off. The job of removing the manifolds had taken about 1.5 hours as the down pipe clamps to the exhaust system were tricky to reach from under the car. As can be seen in the picture (below) they were in a poor state and the gaskets had crumbled away to nothing hence the severe blowing experienced.
Ford Corsair exhaust manifolds that were removed
Corsair (V4) in the garage with it’s exhaust manifolds removed
Nothing too much to write about other than the Corsair saw regular use from September to November 2021 when visiting the workshop where the VW Beetle we have was being worked on – See this link to the WordPress blog about the story of our Beetle. It was running nicely even with a blowing exhaust. I had purchased replacement exhaust manifolds before Christmas but hadn’t found the enthusiasm to fit them, yet as there is a problematic bolt on the offside that I know about and, at the time of writing, ignoring it for now.
Corsair at South Coast Customs & Classics workshop (mid November 2021)
Over the Christmas break I did get around to fitting the new oil pressure switch and rewire the loose brown wire that had been attached to the coil at one point. For the first time in my ownership (remember since March 2000) the oil light on the instrument panel illuminated when the ignition was turned on! The weather had been very damp from there on as well as the roads being generally filthy so it hadn’t been driven since a short run before Christmas.
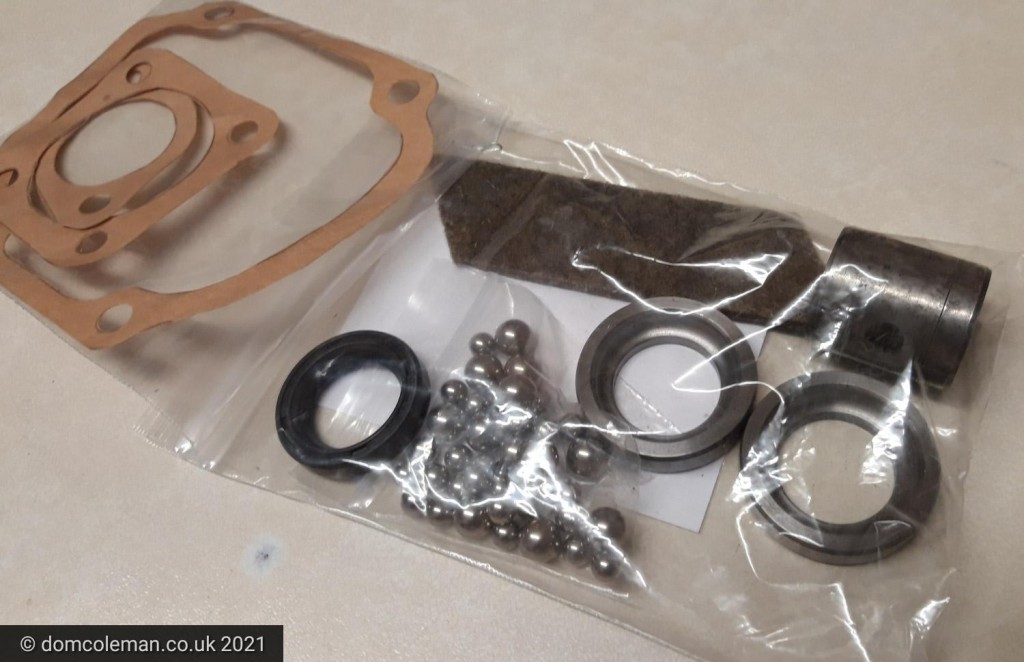
At the end of April, I collected the rebuilt steering box from Holman Engineering in Surrey, a family owned small business nestled between houses on a residential road. The rebuild kit I bought in January for a Mk1 Cortina unfortunately wasn’t quite right, the ball bearing races were too small, but I assumed the rest of the kit that included the gaskets and sector shaft bush were all ok. Jeff (Holman Engineering) sourced the correct size ball bearings with bearing races and the rest of the build was apparently straight forward.
Steering Box rebuild kit (MK1 Cortina) – note bearings and cups too small for Corsair application
It only took a couple hours of an afternoon over the Bank Holiday weekend to re-install, though it was a bit heavy and awkward to get the steering shaft up into the interior without the column bracketry catching on nearly every edge and surface. I made the mistake of tightening the bolts to the body/chassis too soon that it left me no wiggle room to attach the bolts to the pedal supports and dashboard. A bit of back tracking loosening bolts, I could wiggle the steering shaft into place and get the other securing bolts under the dash lined up and fitted. I just had to reconnect the steering drop arm and drag link, refit the steering column bits and the job was done.
Ford Corsair Steering box back in place
Castrol EP 80W gear oil (AGL-4)
I had to wait before I could take the car out for a test drive as I needed to get some SAE 80EP (AGL-4) oil for the steering box, but my local motor factor couldn’t source the specific grade I needed. In the end I used Amazon to buy 2 litres so I can use it on the gear box later, as well. A week later when the weather had improved (or had stayed dry long enough) I took the car for a test drive and to serve as a trip to get some more fuel. It felt so much more positive and responsive to my input and was very smooth to turn and drive. Coupled with the new shock absorbers all round the Corsair is much nicer to drive, just a minor misfire to check which could be a failed spark plug as before.
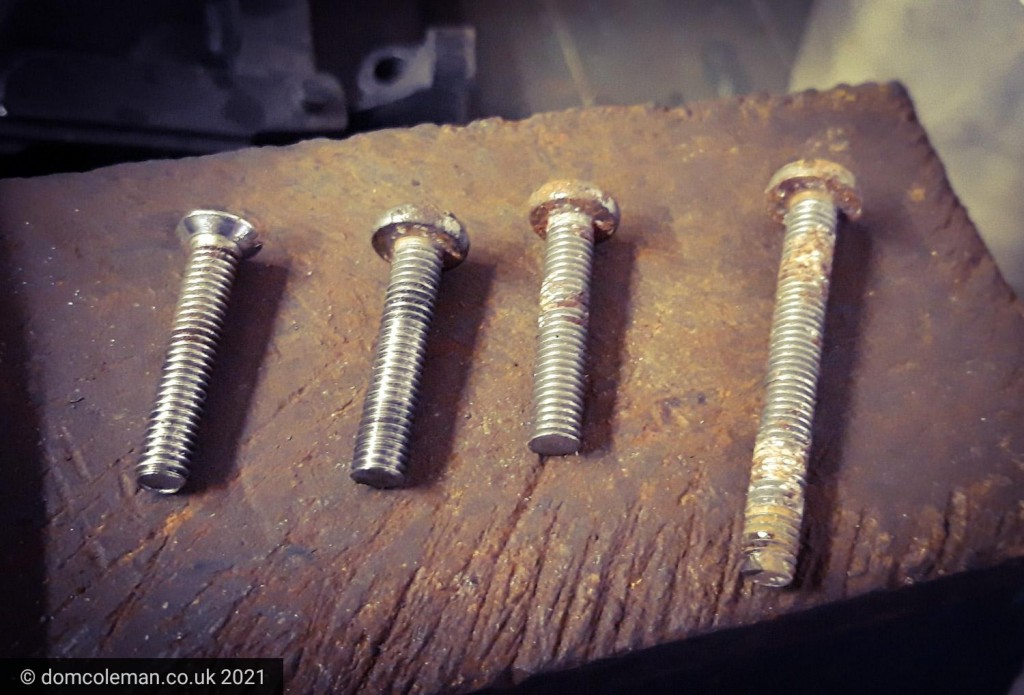
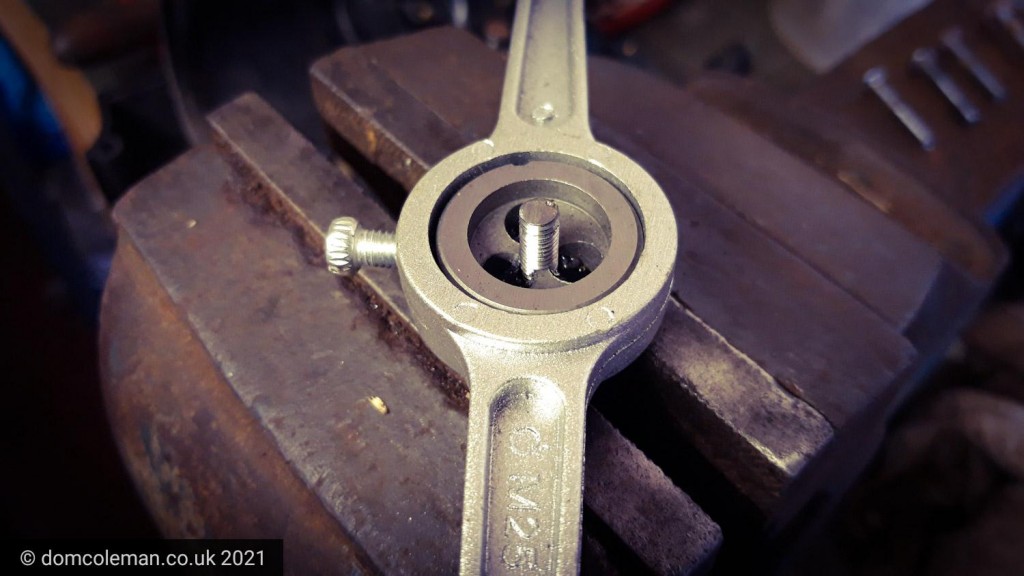
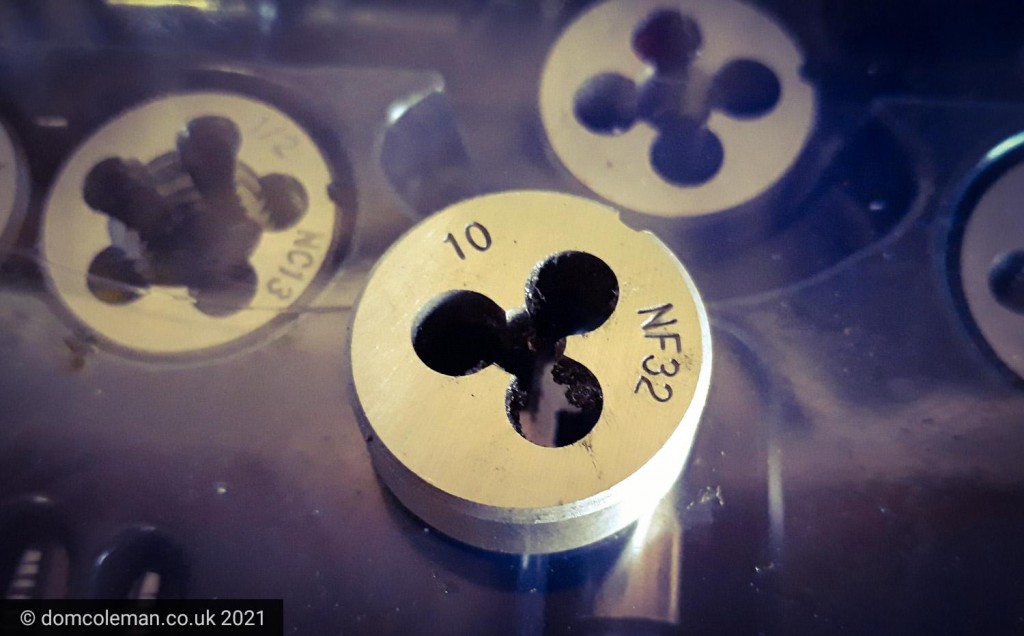
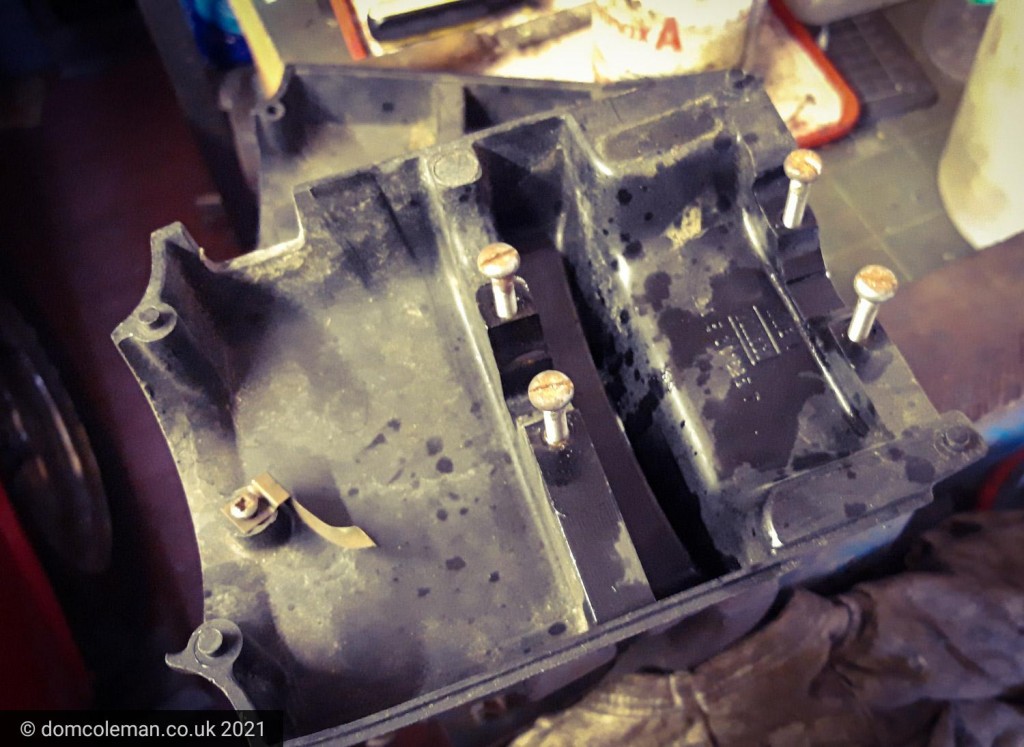
I also took the opportunity to fit a replacement steering column shroud I had bought a while ago, as I had cracked and glued back together my original shroud a few years ago. However, I was missing two bolts, so I had a rummage in my spare bolt jars and found some metric bolts that would fit if cut down and re-cut with a new thread. It was was one of those things that bugged me for a while and now I have 4 bolts to secure the two halves of the steering column shroud.
Original bolt 1st from left, 2nd from left newly die cut bolt – other 2 waiting to be done
Finally in to the new year and there was a nice day (Sunday) to get on and fit the rear shock absorbers I had bought at the end of last year. Initially, I had a drive locally in the Corsair, not too far due to lockdown restrictions but enough to blow the cobwebs out and get get some warm air blowing through the car.
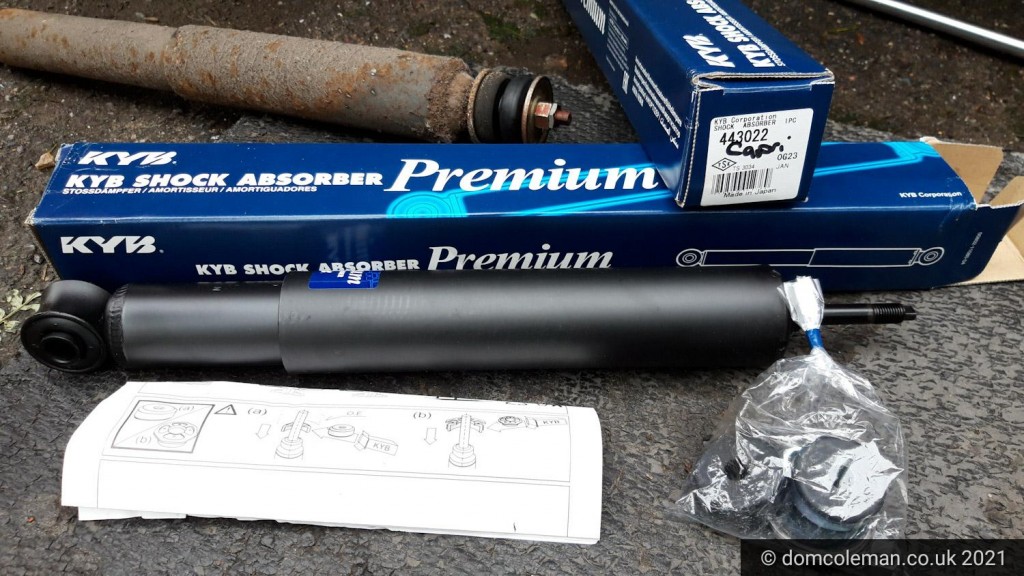
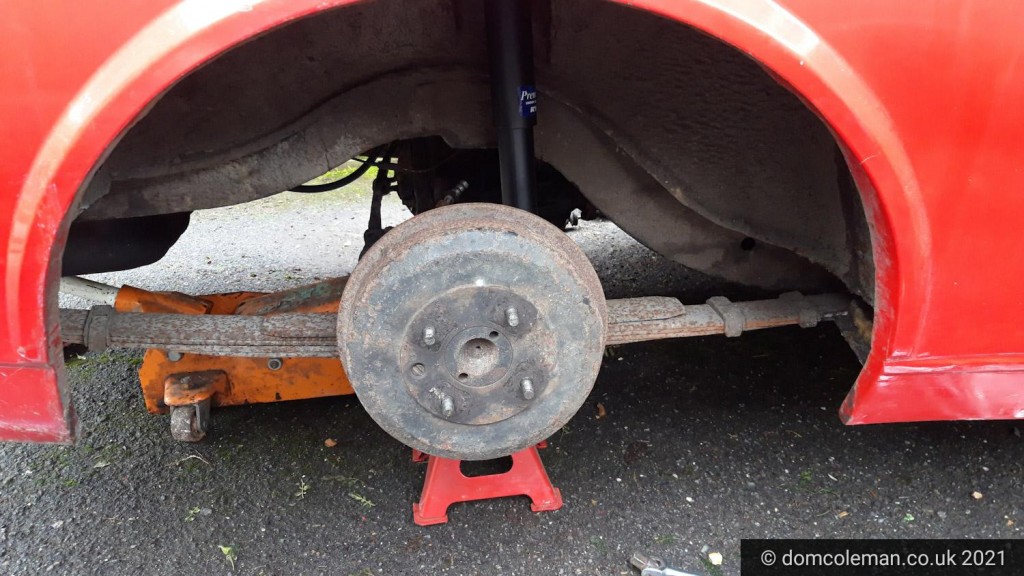
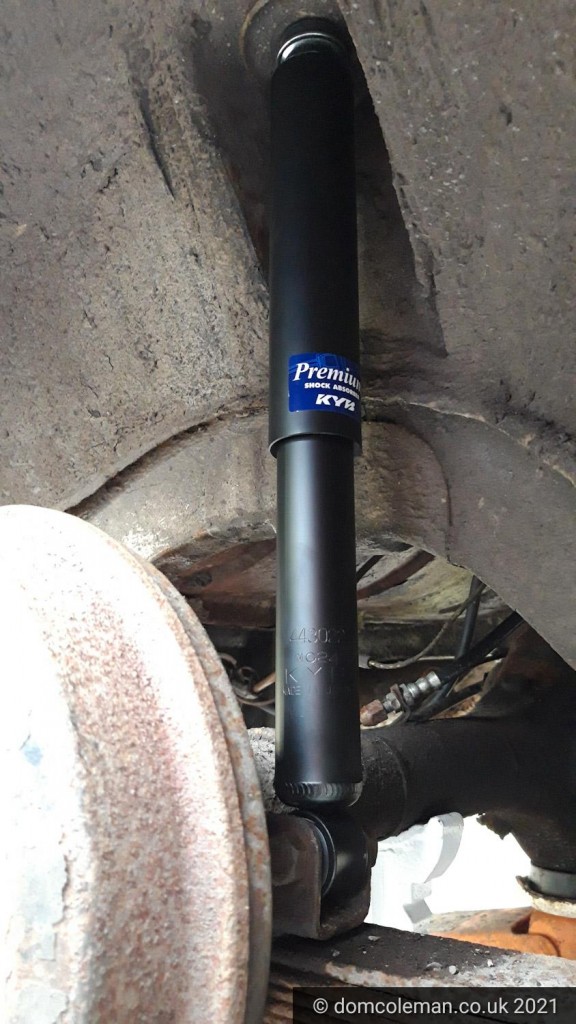
Fitting the shocks wasn’t a difficult job as I had read up on it before starting and it didn’t necessitate in too much preparation. I had applied plenty of WD40 to help free off the lower 3/4 inch bolts which didn’t turn out to be a chore. Neither were the top mounts of the dampers, in the boot, but they were awkward to reach and required mole grips as well as the 9/16 spanner to loosen and undo. The old (Monroe) shocks came out easily and I had no idea if they were in poor condition or not so have been kept as spares.
Fitting the rear shocks was a little more awkward and I soon discovered that fitting the top mounts in place first was easier than fitting the bottom mount. When I did it that way first, I had to push the shock absorber up to the mount hole and then try and get the rubber, washer and bolts on before the mount would disappear through the mounting hole!
Replacement rear shock absorber for the Ford Corsair – note Ford Capri item used.
With the bolts all tightened up and a quick test drive I was happy another job could be ticked off the list and the car was ready for its MOT.
Well, the Corsair failed the MOT with the steering box classed as dangerous and two areas on the rear spring hangers needing welding. The exhaust joints require separating and resealing and there were advisories on a jacking point and the prop shaft rear joint showings signs of wear. So, not a great day and a few issues to sort and while in lockdown may not be done particularly quickly.
Finally on the 17th December, I got to take the Corsair out for a drive on a dry and sunny afternoon. I went to see Paul at South Coast Customs and Classics near Blandford, Dorset to talk about our VW Beetle and the welding work it would need. It was pleasant drive out and the roads weren’t too filthy with all the recent rain. A few days later the weather was back to damp and miserable and I had hoped to drive the Corsair to West Moors like I had done before not only to collect the dog food but also check out an interior light lens I had seen on Ebay a couple of months ago. These are new in that they are 3D printed.
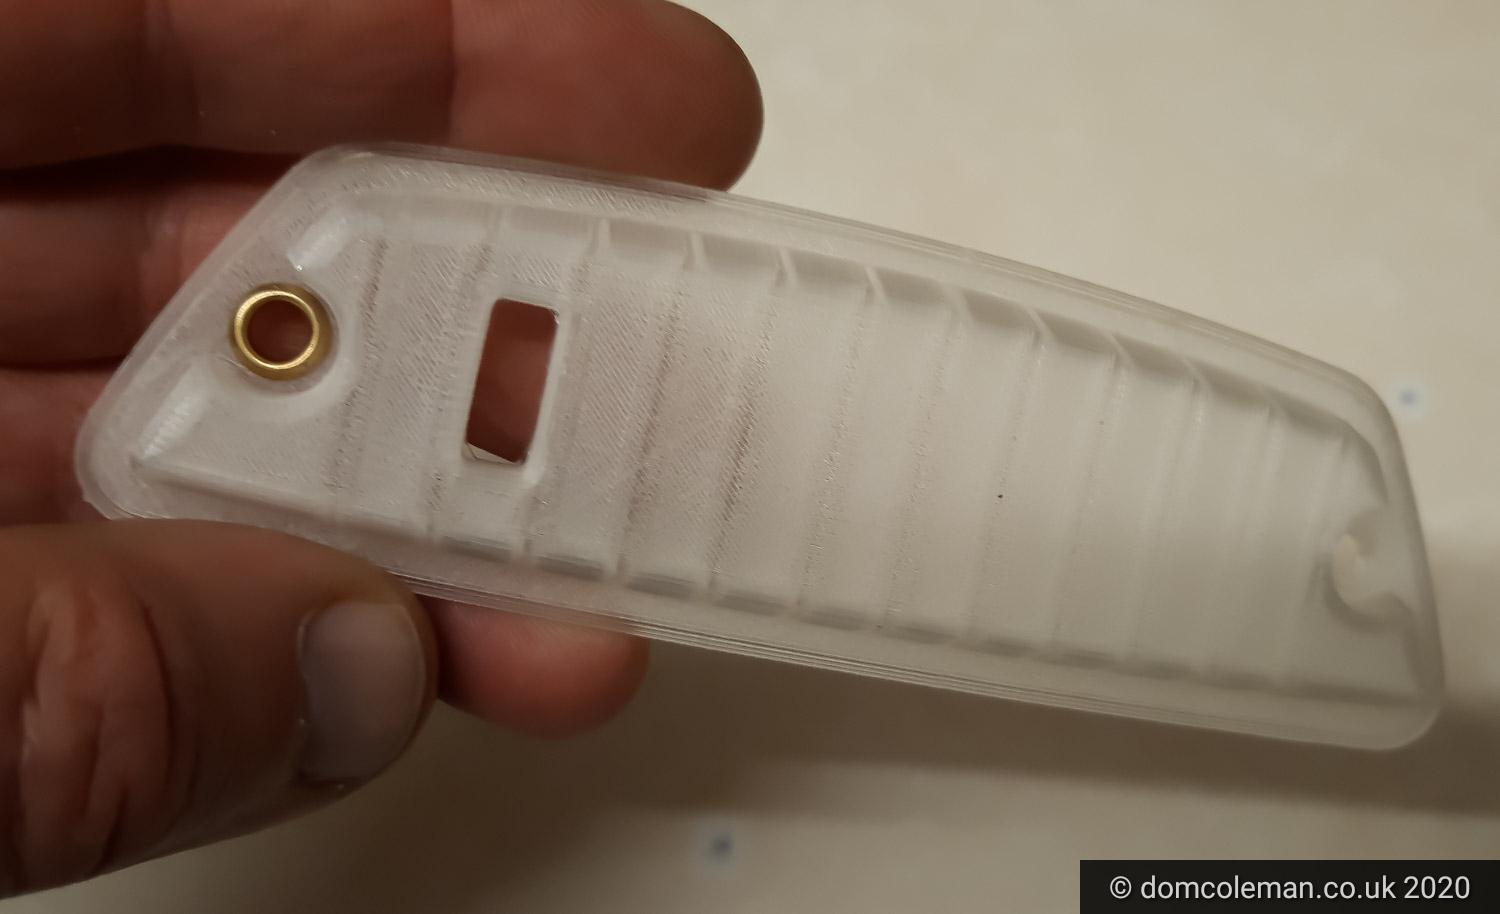
3D printed interior light lens (Ford Cortina/Corsair)
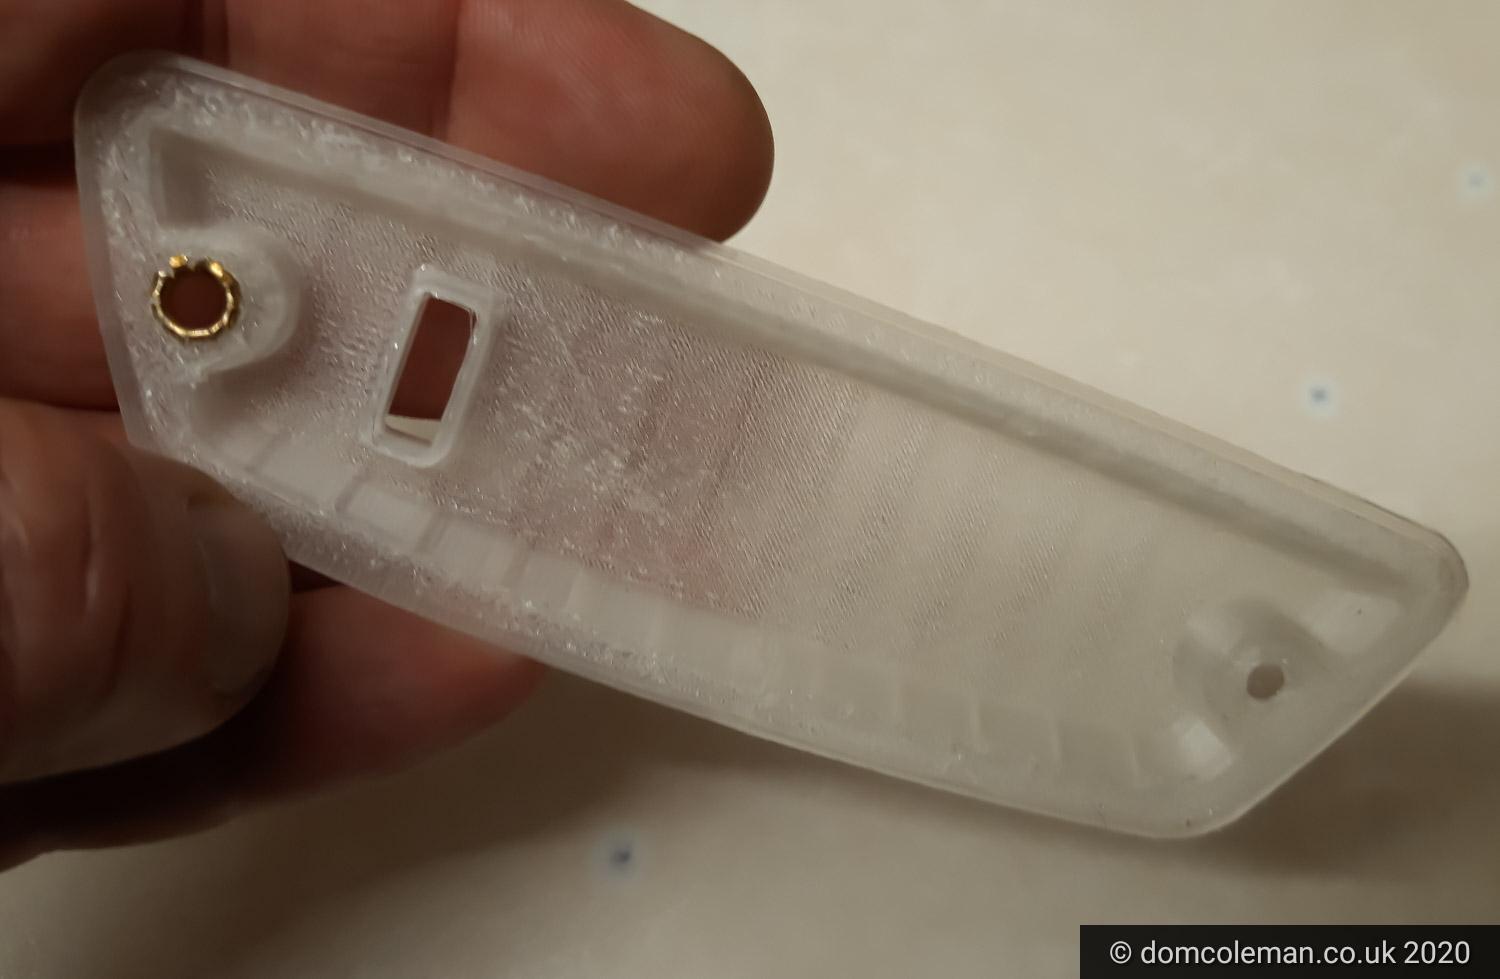
Reverse side of 3D printed interior light lens
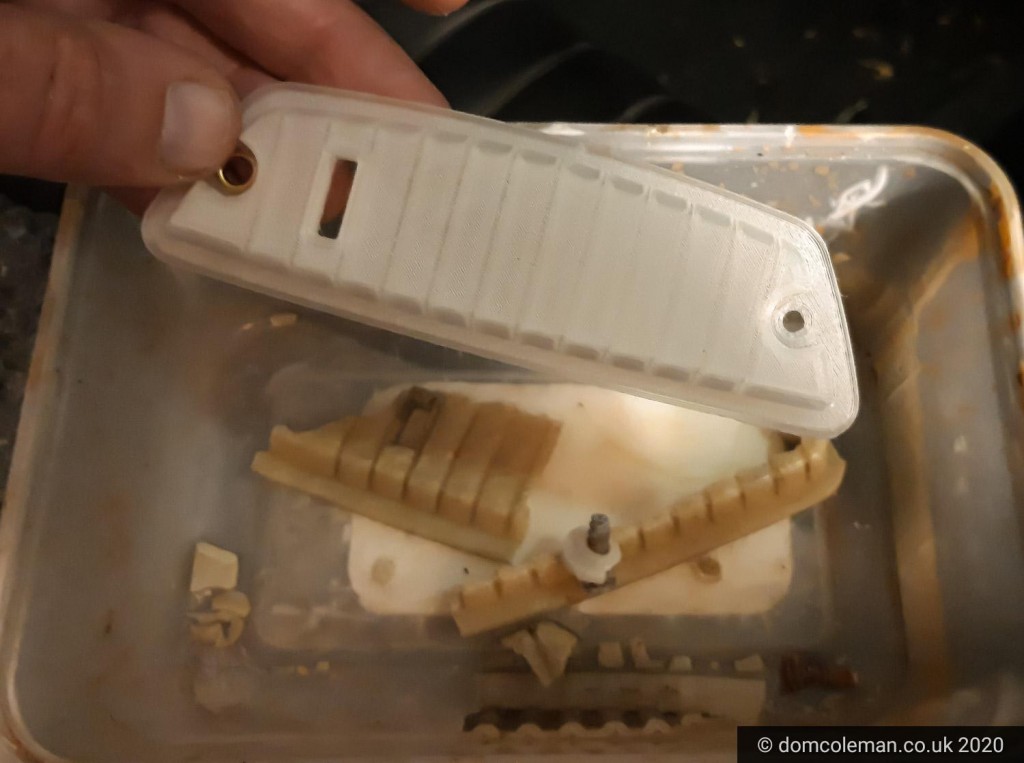
New 3D printed and the original, in the box, in bits
3D printed interior light lens (Ford Cortina/Corsair)
The quality is good and will allow good light to come through, but my interior light didn’t have a bulb and I wouldn’t surprised if it didn’t work anyway. The original lens was extremely fragile and literally crumbled when I removed it from the light base. These were modelled on the interior light of a Mk2 Cortina but like many parts of the era they are the same as the Corsair. There is another type without the slot for the on off switch, which I think may be for the estate variants luggage area and it had a shallower profile. With this 3D replica the fit is not as neat or snug as the original but where the original was a crumbly mess this more than makes up for that. For the purist (or those seeking originality) they won’t meet expectations but for the rest of us, perfectly usable, check out the pictures.
3D printed interior light lens – Ford Corsair but fits Mk2 Ford Cortina
Message me in the comments with an appropriate non spam type reply and include a genuine email address and I can forward the contact details I have for the person who can make (print) these to order.
I had the front wheels laser aligned by 5 Square Motors as it is where I have taken the Corsair for the MOTs, so I was seeking continuity. Unfortunately I couldn’t have the chap who did the MOTs as another mechanic was lined up for the job. On the day the wheels were aligned OK, I presume, but when I asked for a check of the bolts on the TCAs and other suspension parts the mechanic tasked with the job claimed he found a couple of loose bolts and decided he didn’t want to sign off the job as safe, as it was work he hadn’t done. It kind of defeated the object of asking the garage to check as I couldn’t do the final tightening of bolts with the wheels on the ground. I’ll now have to do it with the car up on ramps, just hoping the angle of the car on the ramps won’t interfere with a proper tightening of the bolts.
Late one Friday afternoon and I got the Corsair up on the car ramps. I rechecked all the bolts to the TCAs, steering ball joints and top mounts, none were loose. I did add washers to the ball joint ends just for peace of mind after ‘being advised’ by the mechanic that didn’t want to check my work. I later took the Corsair for a decent drive around the locale and the improved feel of the steering was evident as was the general ride. No longer did the car rattle and shake over bumps and ruts in the road. The new dampers had improved the ride massively, so I would call that a result.